Welcome to
Friendly, Professional Driving Instructor in Weymouth & Dorchester
Weymouth, Dorchester and surrounding areas
Fully Qualified Approved Driving Instructor
Welcome to Bagwell School of Motoring
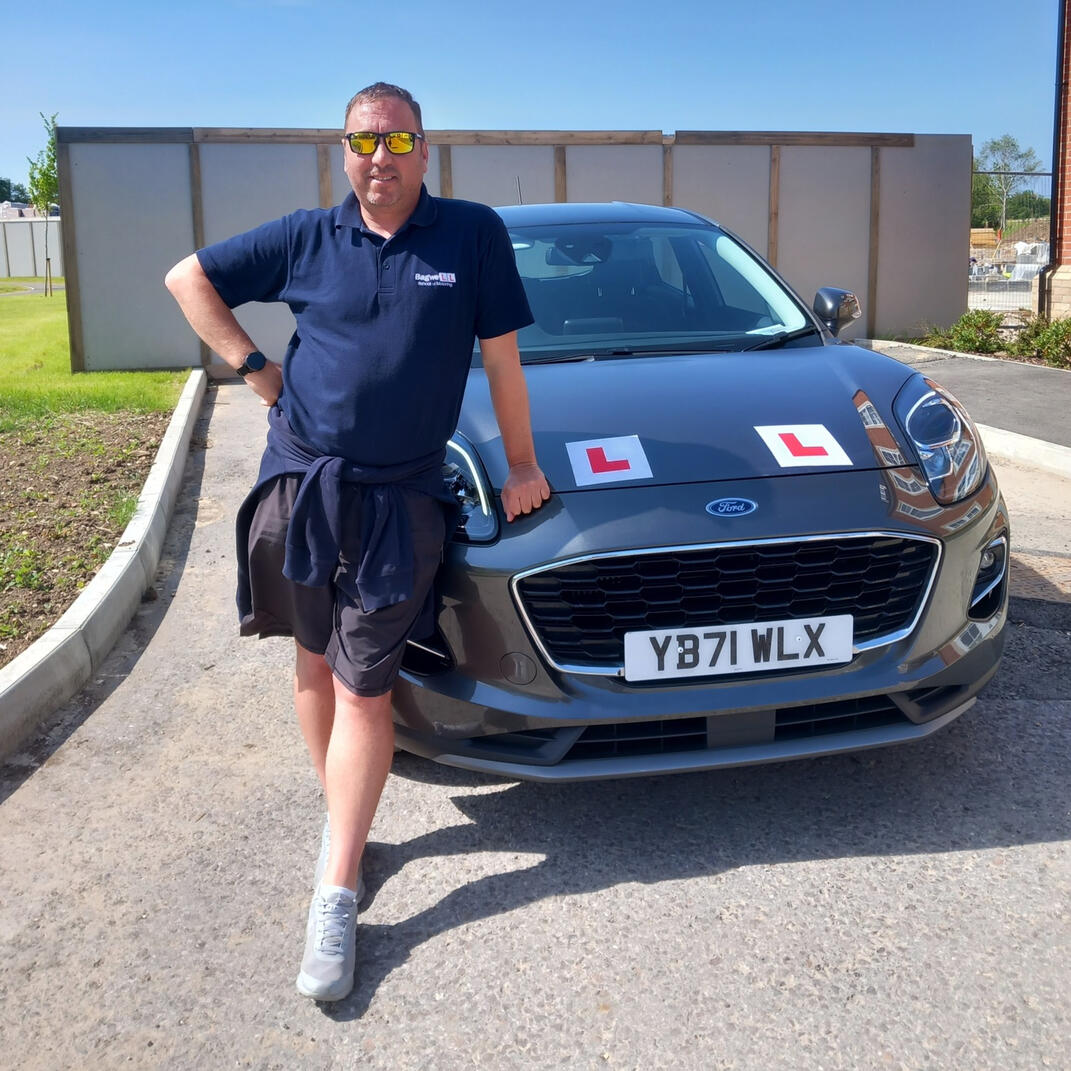
Congratulations on taking your first step toward driving independence. I’m Martyn Bagwell, a Weymouth and Dorchester resident of over 20 years, with 22 years’ experience in education as a qualified teacher. This has helped me develop teaching strategies that suit different learning styles.Since qualifying as a driving instructor in 2022, I have achieved a pass rate of over 85%, with most students passing first time. My aim is to help you become a safe, confident driver for life—not just to pass the practical test.Your safety will always come first. Lessons will focus on building skills step by step, reviewing progress, reinforcing previous learning, and using repetition until you are ready to move forward. I will also guide you on independent practice, co-driver support, and suitable routes.The time it takes to pass depends on your commitment, consistency, and confidence in handling different road conditions. Regular weekly lessons, theory preparation, and extra practice can all help you progress more effectively.To support your learning:• Research: Learn the key skills, vehicle controls, and functions for each stage.• Theory: Study the rules of the road and complete your theory test early.• Prepare: Set clear targets before each lesson.• Practice: Gain extra experience with a qualified supervising driver over 21 who has held a full licence for at least three years, with suitable insurance in place.You are responsible for your learning, but you will be supported throughout. I will work at your pace, offer personalised strategies, and help you understand what to expect on your driving journey.Please read the Terms and Conditions and the ‘Show me/Tell me’ worksheet, and contact me if you have any questions.
PRICING
2 hours - £89
1.5 Hours - £73
1 hour - £47 (not advised for complete beginners)
GET IN TOUCH
Have a question or ready to book your first lesson? Get in touch using the form below.
RESOURCES
Helpful guides and tips to support you at every stage of your driving lesson journey
Clutch Control: A Practical Guide for Manual DrivingEffective clutch control is an essential skill for driving a manual vehicle safely and smoothly. It is particularly important during hill starts, slow-moving traffic, manoeuvring, and parking, where precise control of the vehicle is required.What Is Clutch Control?Clutch control is the technique of using the clutch pedal to manage the connection between the engine and the wheels. By controlling this connection carefully, you can move the vehicle slowly and smoothly without stalling, especially when using first gear.Step-by-Step Guide1. Moving Off• Press the clutch pedal fully down.• Select first gear.• Raise the clutch pedal slowly until you reach the biting point, where the vehicle begins to respond and the engine note may change slightly.• Hold the clutch steady at the biting point.• Apply gentle pressure to the accelerator while gradually releasing the clutch to move away smoothly.2. Driving Slowly• Keep the vehicle in first gear.• Use the clutch pedal to make small adjustments to your speed:• Pressing the clutch slightly reduces drive to the wheels and slows the vehicle.• Releasing the clutch slightly increases drive and helps the vehicle move forward.• Avoid fully releasing the clutch until you are ready to drive at normal road speed.3. Hill Starts• Apply the handbrake to prevent the vehicle from rolling backwards.• Find the biting point using the clutch pedal.• Apply gentle pressure to the accelerator.• Release the handbrake while gradually lifting the clutch to move forward smoothly.4. Stopping Safely• Press the clutch fully down before the vehicle comes to a complete stop to prevent stalling.• Apply the brake smoothly and progressively.• Select neutral if you expect to remain stationary for more than a brief moment.Tips for Avoiding Common Mistakes• Avoid riding the clutch, as keeping it partially engaged for extended periods can cause unnecessary wear.• Practise identifying the biting point, as it can vary between vehicles.• Use clutch control primarily in low-speed situations, not during normal driving once the vehicle is moving freely.
Professional Cockpit Check Procedure1. Doors• Confirm that all doors, including the boot, are fully closed and secure.• Check the dashboard for any door warning lights or audible alerts.• Before opening any door, check mirrors and look over your shoulder for cyclists, pedestrians, or passing traffic.• Open the door safely using the Copenhagen Method where appropriate.2. Seat• Adjust the seat so that all pedals can be reached comfortably and safely.• Ensure your knees remain slightly bent when the clutch is fully pressed.• Use the seat adjustment lever or bar correctly, then confirm the seat is locked securely in position.• Never adjust the seat while the vehicle is moving.• Position the head restraint so the centre is approximately level with your eyes or ears and close to the back of your head.3. Steering• Adjust the seat back so that the steering wheel can be held comfortably.• Keep your arms relaxed with a slight bend at the elbows.• Confirm that your driving position gives you a clear, unobstructed view of the road and instruments.4. Seatbelt• Fasten your seatbelt before moving off and ensure all passengers are wearing theirs correctly.• Position the lap belt low across your hips and the shoulder belt across your chest and shoulder.• Check that the belt is not twisted, tangled, damaged, or obstructed.• Pull the belt gently to confirm it locks, and ensure the buckle clicks securely into place.5. Mirrors• Adjust all mirrors before moving off, after settling into your normal driving position.• Set the interior mirror to provide the best possible view through the rear window.• Set the exterior mirrors so that only a small part of your vehicle is visible at the inner edge.• Use the anti-dazzle function at night when required, and return it to the normal position afterwards.• Do not adjust mirrors while driving; handle mirror edges where possible to avoid fingerprints.• Check mirrors after car washes and during adverse weather for frost, condensation, or reduced visibility.Memory aid:Use DSSSM to remember the cockpit check order: Doors, Seat, Steering, Seatbelt, Mirrors.
Dual Carriageways: Professional Safety GuideA dual carriageway is a road where traffic travelling in opposite directions is separated by a central reservation. Each carriageway may have one or more lanes, although many dual carriageways have two or more lanes in each direction.Key Safety GuidanceJoining a Dual Carriageway• Use the slip road to build up speed safely and match the flow of traffic where possible.• Check mirrors and blind spots before merging.• Give way to traffic already travelling on the carriageway.• Merge smoothly and avoid stopping unless it is absolutely necessary.Lane Discipline• Use the left lane for normal driving.• Use the right-hand lane or lanes for overtaking, where safe and legal.• After overtaking, return to the left lane as soon as it is safe to do so (once you see the vehicle in your main mirror).Speed Limits• The national speed limit for cars on dual carriageways is 70 mph, unless signs indicate a lower limit.• Observe all posted speed limits, including temporary or variable limits in roadworks or controlled areas.Overtaking• Only overtake when it is safe, legal and necessary.• Check mirrors and blind spots before changing lanes.• Signal clearly and in good time before moving out or returning to the left lane.Exiting a Dual Carriageway• Look ahead for signs showing your required exit.• Move into the left lane in good time.• Use your left indicator to show your intention to leave.• Reduce speed on the slip road rather than on the main carriageway.Hazards to Watch For• Breakdowns: move to a safe place, such as a hard shoulder or lay-by, if one is available.• Debris or animals: avoid sudden manoeuvres and report hazards to the appropriate authority when safe to do so.• Weather conditions: adjust your speed, increase following distance and drive according to visibility and road conditions.Additional Safe Driving Practices• Maintain a safe following distance, using the two-second rule in good conditions and allowing more space in poor weather.• Do not use the hard shoulder unless it is an emergency or signs instruct you to do so.• Stay alert and anticipate changes in traffic flow, especially on busy or fast moving sections.
Moving Away, Stopping and Parking Safely1. Moving Away Safely• Prepare the vehicle:• Select the correct gear: first gear when moving forwards, or reverse when moving backwards.• Set the gas and find the clutch bite point smoothly.• Keep the handbrake applied until you are ready to move.• Observe carefully:• Check ahead, behind, mirrors and blind spots (Molly and Dolly/Polly) to confirm it is safe.• Signal if another road user would benefit from knowing your intention.• Release the handbrake, steer out smoothly and bring the clutch up under control.2. Stopping and Parking• Use Mirror, Signal, Manoeuvre (MSPSL):• Check your mirrors, signal when appropriate, then adjust your position or speed safely.• Choose a safe and legal place:
• Avoid stopping near bends, junctions, driveways, double yellow lines or anywhere that may cause danger or obstruction.• Secure the vehicle correctly:• Park close to the kerb without touching it, leave suitable space for other vehicles, switch off the engine and lights, apply the parking brake and leave the car in gear.3. Parking on a Hill• Facing uphill: Turn the wheels to the right, towards the kerb. Leave the vehicle in first gear and apply the parking brake.• Facing downhill: Turn the wheels to the left. Leave the vehicle in reverse gear and apply the parking brake.Key Reminders• Always check blind spots (Molly and Dolly/Polly) before moving away or opening a door.• Use the Mirror, Signal, Manoeuvre (MSPSL) routine before changing speed or direction.• Before parking, ask: is it safe, legal and practical to stop here?
How to Navigate Roundabouts Safely in the UKNavigating roundabouts correctly is essential for maintaining safe, smooth traffic flow.In the UK, drivers should approach with care, select the correct lane early, give way where required, and signal clearly when changing direction or exiting.Approaching the Roundabout1. Reduce speed and be prepared to stop if necessary.2. Observe road signs and lane markings to position your vehicle correctly for your intended exit.3. Signal clearly to indicate your intended direction.a. First exit: signal left on approach.b. Straight ahead: do not signal on approach; signal left after passing the exit before the one you intend to take.c. Right turn or later exit: signal right on approach, then signal left after passing the exit before yours.Entering the Roundabout• Give way to traffic approaching from the right, unless signs or road markings indicate otherwise.• Enter only when it is safe to do so, remaining alert to cyclists, motorcyclists, pedestrians, and other vulnerable road users.Driving Around the Roundabout• Remain in the correct lane and follow any lane arrows or road markings.• Maintain appropriate signalling throughout your manoeuvre.• Check mirrors and blind spots regularly, particularly where other vehicles may change lanes or exit unexpectedly.Exiting the Roundabout• Signal left after passing the exit immediately before the one you intend to take.• Check mirrors and blind spots before moving towards the exit.• Leave the roundabout smoothly while maintaining a safe and appropriate speed.Additional Safety Considerations• Mini-roundabouts: apply the same rules, but proceed with extra caution due to limited space and tighter manoeuvres.• Multi-lane roundabouts: follow lane markings carefully and avoid changing lanes unless it is safe and necessary.• Pedestrian crossings: remain alert for crossings near exits and be prepared to stop where required.
Driving Safely on Rural RoadsRural roads across the UK present distinctive driving challenges, including narrow lanes, limited visibility, sharp bends, uneven surfaces, and the presence of vulnerable road users.This guide outlines practical steps drivers can take to reduce risk, improve awareness, and travel safely in rural areas.Key Safety Guidance for UK Rural Roads1. Adjust Your Speed to the Conditions• Although the national speed limit may apply on some rural roads, it is not always safe or appropriate to drive at the maximum permitted speed.• Maintain a speed that enables you to stop safely within the distance you can clearly see ahead.2. Anticipate Common Hazards• Approach sharp bends, blind corners, hidden junctions, and narrow sections with caution.• Remain alert for slow-moving vehicles, tractors, cyclists, horse riders (10mph), pedestrians, and wildlife.• Look out for surface hazards such as mud, gravel, standing water, potholes, and loose debris.3. Use the Horn Appropriately• On narrow roads or blind bends, a brief and considerate use of the horn can help alert other road users to your presence.4. Allow Adequate Space for Other Road Users• Give cyclists, pedestrians, and horse riders plenty of room and avoid passing unless it is safe to do so.• When passing horses, slow down significantly, leave a wide gap, avoid sudden noise, and proceed with patience.5. Manage Narrow Roads and Passing Places• Be prepared to slow down, stop, or reverse safely to a suitable passing place when necessary.• Use passing places courteously to allow oncoming vehicles or faster-moving traffic to pass.6. Take Extra Care When Driving at Night• Use full beam headlights where appropriate, but dip them promptly for oncoming vehicles or when following another road user.• Reduce speed and remain alert for wildlife, pedestrians, cyclists, and unlit hazards.7. Plan for Weather and Road Conditions• Rural roads can be particularly affected by fog, ice, flooding, fallen branches, and poor drainage.• Check conditions before travelling and adapt your speed, route, and stopping distance accordingly.Additional Good Practice• Do not rely solely on satellite navigation; check your route in advance, especially when travelling through remote areas.• Pay close attention to local signs warning of farm entrances, livestock, schools, sharp bends, or changing road conditions.• Remember that many rural roads are unlit, so adjust your speed and observation accordingly.
Safe Road Positioning: Professional Driving Guide1. General Positioning• Always drive on the left-hand side of the road in Great Britain.• Maintain a safe clearance when passing parked vehicles.• Remain alert for opening vehicle doors, pedestrians, and children near parked cars.• Avoid driving too close to the kerb, particularly where pedestrians may be present.2. Turning• Turning left or continuing ahead: Keep to the left lane unless road markings indicate otherwise.• Turning right: Move into the centre or right-hand lane when it is safe and appropriate to do so.3. One-Way Roads• Left turn: Use the left-hand lane.• Right turn: Use the right-hand lane, provided it is clear and safe.• Straight ahead: Follow road markings and use the left-hand lane if you are unsure.• Move into the correct lane in good time and remain aware of vehicles changing lanes around you.4. Lane Discipline• Observe and follow all lane markings.• Position the vehicle in the correct lane well in advance.• If you enter the wrong lane, do not cut across traffic; continue safely and correct your route when appropriate.• At roundabouts, maintain your lane and avoid cutting across other vehicles.5. Changing Lanes• Choose your lane early and check your mirrors before moving.• Signal clearly before changing position.• Remain centred within your lane until a lane change is necessary.• Avoid weaving, straddling lanes, changing at the last moment, or moving without signalling.• Check carefully for cyclists, motorcyclists, large vehicles, opening car doors, and pedestrians.6. Special Lanes• Only use bus, taxi, or cycle lanes when permitted to do so and when it is safe and legal.7. Road Junctions• Move into the correct lane early and avoid sudden changes of position.• Two lanes: Use the left lane for turning left or continuing ahead, and the right lane for turning right.• Three lanes: Use the left lane for turning left, the left or centre lane for continuing ahead, and the right lane for turning right.• Do not use an inappropriate lane to gain an advantage over other traffic.8. Bends• Assess the bend ahead, including its sharpness, visibility, road surface, traffic conditions, and weather.• Left-hand bend: Stay centred within your lane.• Right-hand bend: Keep to the left of your lane to improve your view where appropriate.• Do not move towards the centre of the road when negotiating bends.9. Passing Obstructions• Plan ahead when approaching any obstruction.• Use the Mirror, Signal, Manoeuvre (MSPSL) routine before changing position.• Decide whether to wait or pass based on road width, visibility, location, traffic flow, and available space.• If the obstruction is on your side of the road, give way to oncoming traffic.• If the obstruction is on the opposite side, be prepared to give way and watch for hidden pedestrians.10. Passing Cyclists• Give cyclists at least as much room as you would give when passing another car.• Be patient and overtake only when it is safe, legal, and necessary.• Remember that cyclists may travel faster downhill and slower uphill, so allow extra time and space.11. Narrow Roads• Look well ahead and be prepared to slow down or stop.• Use passing places where necessary and appropriate.• Avoid stopping on soft verges or unstable ground.• Reduce speed when your view is restricted.• Give cyclists and horse riders plenty of space and pass with care.12. Key Recap• Position your vehicle safely to protect yourself and other road users.• Follow the Highway Code and respond appropriately to road signs and markings.• Use the Mirror, Signal, Manoeuvre (MSPSL) routine whenever changing position.
Town Driving: Professional Guidance for Safe Urban
DrivingDriving in a UK town requires careful observation, sound judgement and consistent control.Urban roads often include busy junctions, pedestrian crossings, parked vehicles, cyclists, buses and frequent changes in speed limits.The following guidance
outlines the key areas to consider when driving safely and confidently in town environments.Key Considerations for Town Driving1. Speed Awareness• Typical speed limits are 20–30 mph in towns.• Watch for 20 mph zones, especially near schools and residential areas.• Always obey temporary speed limits in roadworks or congested zones.2. Pedestrian Awareness• Be alert for zebra crossings, pelican crossings, and school patrols.• Stop if someone is waiting at a zebra crossing.• Watch for pedestrians stepping out unexpectedly, especially in busy shopping areas.3. Traffic Flow and Junctions• Expect frequent roundabouts, T-junctions, and traffic lights.• Use your indicators clearly and early.• Be prepared to give way and stop-start often.4. Parking and Waiting Restrictions• Look for signs and markings—yellow lines, bays, and restrictions.• Avoid blocking driveways, bus stops, or disabled bays.• Use pay-and-display machines or apps where required.5. Cyclists, Buses and Vulnerable Road Users• Give at least 1.5 metres when overtaking cyclists.• Watch for bus lanes—only use them if signs permit.• Be cautious around bus stops and school zones.6. Route Planning and Distractions• Use a sat nav or map app to plan your route, but don’t rely solely on it.• Avoid distractions—keep your phone out of reach unless hands-free.7. Road Signs and Road Markings• Pay close attention to one-way systems, no entry signs, and give way markings.• Follow lane arrows and filter lanes correctly.Professional Driving Tips• Remain calm and patient in slow-moving traffic.• Anticipate the actions of pedestrians, cyclists and other drivers.• Maintain a safe following distance and be prepared for sudden stops.• Use mirrors regularly and check blind spots before changing position.• Drive defensively and allow extra time for complex or unfamiliar routes.
Professional Vehicle Safety Checklist1. Daily Checks Before Driving• Ensure all windows and mirrors are clean, clear, and free from obstruction.• Adjust mirrors correctly before setting off.• Confirm there is sufficient fuel or charge for the planned journey.• Visually inspect tyres for obvious damage, low pressure, or signs of wear.• Adopt the habit of checking the vehicle before every journey.2. Weekly Maintenance Checks• Check engine oil, brake fluid, engine coolant, and screen wash levels, topping up where necessary in line with the vehicle handbook.• Walk around the vehicle to inspect tyres, lights, indicators, and the overall condition of the bodywork.3. Servicing and MOT Requirements• Arrange a full vehicle service at least once a year, or in accordance with the manufacturer’s recommended mileage interval.• Use servicing to identify potential issues early and maintain the vehicle’s safety, reliability, and performance.• Ensure the vehicle has a valid annual MOT where required.4. Checks Before Longer Journeys• Confirm that all lights, indicators, and brake lights are working and clean.• Clean all windows and mirrors to maintain clear visibility.• Check that there is enough fuel or charge to complete the journey safely.• Inspect oil, brake fluid, engine coolant, and screen wash levels.• Check tyre pressures and overall tyre condition, including tread and visible damage.• Set the navigation system before departure and review the planned route in advance.5. Windscreen, Windows, and Visibility• Clear the windscreen fully before driving.• Use the demister, air conditioning, or heater to remove condensation safely.• Remove snow, ice, leaves, and other debris from windows, mirrors, lights, and the roof where needed.• Use de-icer or an ice scraper for frozen glass; do not use hot water, as this may damage the glass.• Clean bird droppings and other contaminants promptly to protect visibility and paintwork.
Show Me Questions: Driving Test PracticalDuring the practical driving test, candidates may be asked to demonstrate one vehicle control while driving.The following prompts should be practised in advance so each action can be completed safely, confidently, and without distraction.1. Rear windscreen wash/wipe:
When it is safe to do so, demonstrate how to wash and clear the rear windscreen.2. Front windscreen wash/wipe:
When it is safe to do so, demonstrate how to wash and clear the front windscreen.3. Dipped headlights:
When it is safe to do so, demonstrate how to switch on the
dipped headlights.4. Rear demister:
When it is safe to do so, demonstrate how to operate the rear demister.5. Horn:
When it is safe to do so, demonstrate how to sound the horn.6. Front windscreen demister:
When it is safe to do so, demonstrate how to demist the front windscreen.7. Side window:
When it is safe to do so, demonstrate how to open and close the side window.Safety note:
Candidates should maintain full control of the vehicle, keep appropriate observation, and only operate controls when it is safe to do so.
Driving Test Vehicle Safety QuestionsA concise revision guide for the official “Tell Me” questions asked at the start of the practical driving test.1. Tell me how you would check that the brakes are working before starting a journey.The brakes should not feel spongy or slack. They should be tested as the vehicle moves off, and the vehicle should not pull to one side.2. Tell me where you would find the recommended tyre pressures for this car and how tyre pressures should be checked.Refer to the manufacturer’s guide. Use a reliable pressure gauge, check and adjust the pressures when the tyres are cold, include the spare tyre if fitted, and refit the valve caps securely.3. Tell me how you would make sure your head restraint is correctly adjusted so it provides the best protection in a crash.The rigid part of the head restraint should be at least as high as the eyes or the top of the ears, and positioned as close to the back of the head as is comfortable. Some head restraints may not be adjustable.4. Tell me how you would check that the tyres have sufficient tread depth and are safe to use on the road.Check that there are no cuts or bulges. The tread depth must be at least 1.6 mm across the central three-quarters of the tyre and around the full outer circumference.5. Tell me how you would check that the headlights and tail
lights are working. You do not need to exit the vehicle.Operate the switch, turning on the ignition if necessary, then explain that you would walk around the vehicle to check the lights.6. Tell me how you would know if there was a problem with your anti-lock braking system.The ABS warning light would illuminate if there was a fault with the anti-lock braking system.7. Tell me how you would check that the direction indicators are working. You do not need to exit the vehicle.Operate the switch, turning on the ignition if necessary, then explain that you would walk around the vehicle to check the indicators.8. Tell me how you would check that the brake lights are working on this car.Operate the brake pedal and use reflections in windows or doors, or ask someone to help you check the lights.9. Tell me how you would check that the power-assisted steering is working before starting a journey.If the steering feels heavy, the system may not be working. Apply gentle pressure to the steering wheel while starting the engine; a slight movement should be felt. Alternatively, turning the steering wheel just after moving off should confirm that the assistance is working.10. Tell me how you would switch on the rear fog light(s) and explain when you would use it/them. You do not need to exit the vehicle.Operate the switch, turning on dipped headlights and the ignition if necessary. Check that the warning light is on. Rear fog lights should be used when visibility is seriously
reduced.11. Tell me how you would switch your headlights from dipped to main beam and how you would know main beam is on.Operate the switch with the ignition or engine on if necessary, and check that the main beam warning light is displayed.12. Open the bonnet and tell me how you would check that the engine has sufficient oil.Identify the dipstick or oil level indicator and describe checking the oil level against the minimum and maximum markers.13. Open the bonnet and tell me how you would check that the engine has sufficient engine coolant.Identify the high and low level markings on the header tank, where fitted, or the radiator filler cap, and describe topping up to the correct level.14. Open the bonnet and tell me how you would check that you have a safe level of hydraulic brake fluid.Identify the brake fluid reservoir and check the level against the high and low markings.
Terms and ConditionsBy paying for and attending lessons, you agree to the following terms and conditions:1. All lessons must be paid for no later than 48 hours before the scheduled lesson time.2. If you need to cancel a lesson, Bagwellsom requires a minimum of 48 hours’ notice before the lesson is due to begin. If a lesson is cancelled by the student after this
time, the full lesson fee remains payable. Bagwellsom will make every effort to rearrange the lesson with another student in that slot; however, this cannot be guaranteed. If the slot is successfully filled, your payment will be refunded in full or, if you prefer, carried forward to your next lesson.3. If the student is unwell, they must consider their ability to drive safely and the risk of passing on any infectious illness to the instructor. Cancellation in these circumstances will be at the instructor’s discretion.4. In the unlikely event that Bagwellsom is unable to deliver a lesson, every effort will be made to contact the student at the earliest convenient opportunity. The lesson will be rescheduled for a mutually convenient date at no additional cost.5. No lesson will take place if there is any suspicion that the student is under the influence of drugs or alcohol. This is illegal, irresponsible, and will not be tolerated, even if a period of time has passed since drugs or alcohol were consumed.6. Lesson slots are reserved for each student’s convenience and will take place regularly as agreed with the instructor. Students are asked to keep to these times wherever possible, or to inform the instructor as soon as possible if they are unable to do so when arranging the next lesson. If the instructor has not heard from the student withing 4 weeks he cannot guarantee the slot will be still available.7. If a lesson is cut short by the student due to unforeseen circumstances, no refund
will be given.8. Poor behaviour or rudeness will not be tolerated at any time. This may result in the instructor refusing to provide further lessons to the student.9. All lessons will be personalised and tailored to the individual student. It is the student’s responsibility to arrive ready and willing to learn.10. If the instructor is running more than 10 minutes late, they will contact the student by phone. Wherever possible, the lost time will be made up at the end of that lesson.11. Lesson prices are subject to change. At least one month’s notice will be provided before any change takes effect.12. Please inform the instructor of any changes to your provisional licence.Tests1. Students are strongly advised to pass their theory test before starting lessons, although the instructor understands this is not always possible. Please allow at least six months after passing the theory test to secure a practical driving test. (Since the March 2026 changes to booking tests, tests are easier to book so dont panic).2. Bagwellsom operates from the Dorchester Driving Test Centre and will charge for a two-hour lesson on the day of the test. Other test centres may be used; however,
students must use their own vehicle.3. Regular mock tests will take place during lessons. If the instructor feels the student is not ready for the practical test, Bagwellsom reserves the right to refuse the use of the instructor’s car on the day of the test. This decision will be made at least two weeks before the practical test date. The student will be kept fully informed, as mock testing will begin at least four weeks before the practical test date.4. Students may use their own car for the test, provided it is fully road legal and has appropriate, up-to-date insurance. A spare rear-view mirror is required for the examiner. Please speak to your instructor if you need advice on this.5. At the end of the test, the student will be driven home by the person who accompanied them to the test.Standards of Lessons1. The instructor will endeavour to tailor lessons to the most suitable learning style for each individual student. This will be achieved through the instructor’s experience and ongoing communication with the student. It is strongly advised that any pre-existing conditions or additional learning needs to be disclosed to the instructor at the first point of engagement so that lessons can be appropriately adapted.2. Each student will have a learning journal, which will be completed at the end of each lesson. This will record what the lesson covered, where it took place, what went well, and any areas for improvement. This will be completed through self-assessment and guidance from the instructor.3. Goals will be set at the beginning and end of each lesson.4. The learning journal is available to each student on request, allowing them to monitor their progress.5. After the student has passed their practical test, they will receive their own copy of the learning journal for reference.6. During lessons and after the final test, photographs of the student may occasionally be taken and used on social media to celebrate their achievements. This is entirely voluntary and will only take place with the student’s permission.
Just want to say a massive thank you to Martyn Bagwell from Bagwell school of Motoring! A great guy who was so easy to work with through his patience and calmness towards teaching. I would highly recommend him to anyone wanting to learn how to drive safely and get the best out of themselves on the road. His technique in teaching as-well allowed me to understand my own mistakes and notice them before being told them creating an image in my mind of what did go well and what didn’t. Overall this self analysis and further advice helped me achieve a well controlled drive and understand how to avoid making the same mistakes again. From the first lesson in the park and ride teaching me about the car to the final day he taught me how to drive calm and controlled and most importantly, safely!Thank you for everything Martyn!Tyler, August 2026Martyn is a brilliant driving instructor. I found the lessons very good and structured to what I wanted to learn. His teaching is very supportive which has enabled me to become a better driver. I am very thankful that he has been able to help me and was able to pass first time.Evie, August 2026Martyn has been an absolute star helping me learn to drive! So encouraging, very knowledgable and very understanding.
Made me feel comfortable and safe even when I’m in control and had explained everything to me in very clear detail.Thank you very much Martyn!Kai, July 2026Martyn was an amazing driving instructor, he helped me so much in gaining confidence while driving. He's amazing at listening and adapting his teaching approach to his students to ensure that they are learning the best way they can with him. I have enjoyed so much learning to drive with Martyn and I'm so very thankful for what he has helped me achieve :)Mia, March 2026Thank you so much Martyn.
I couldn’t recommend Martyn enough, he is the most amazing, calm, helpful, reliable, and funny driving instructor. I’ve learnt so much from him, not only how to pass my test but how to drive in day to day life, which I feel is different to most, and also how to remain calm in stressful situations on the road. I found the way Martyn teaches perfect for me, and I couldn’t thank him enough. I will miss my lessons with him.Aaliyah, March 2026